~ 2 min read
6 stages of refactoring a jest test case

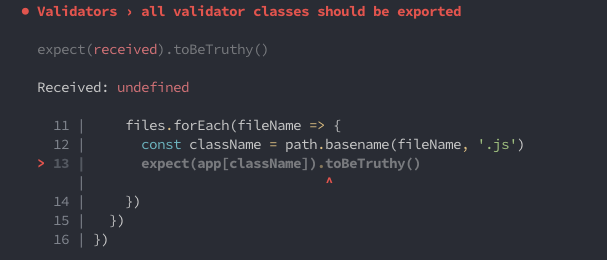
An underrated feature of Jest is customizing the assertion errors that the console displays when tests fail. Imagine the following test code, which needs to programmatically loop an object to ensure keys exist as expected:

The test is written fine but imagine a developer on the team made some changes to the code, added a new file in one place, but forgot to add it to another place such as to export it properly.
When the test fails the reason for failing will not be intuitive and if you’re new to the code you’d likely not even know what broke:
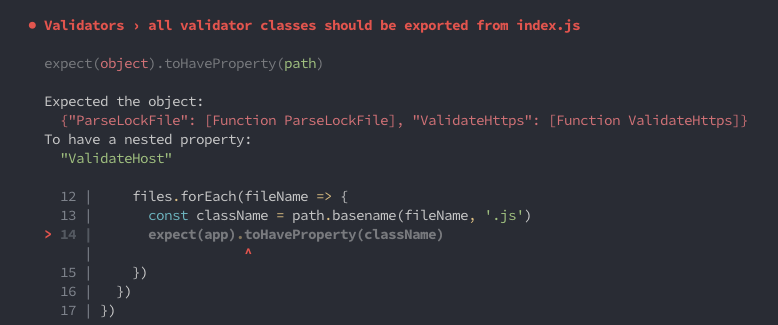
So jest has more semantic expectations such as toHaveProperty(), which looks like this:

Now when a test fails it at least makes it clearer as to which property is missing, but it’s still a bit cryptic as you can see in the screenshot. What can we do? 🤔
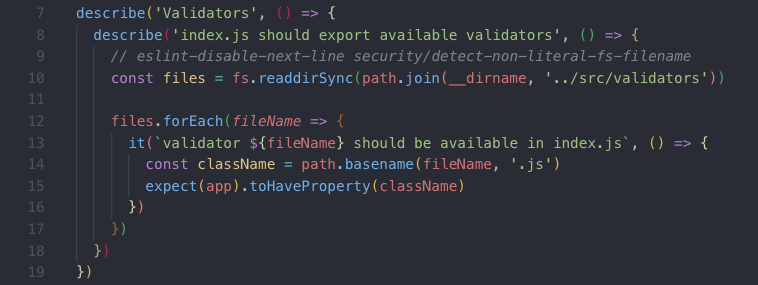
At this point, it might be good enough. The test name is self-explanatory as you can see but the issue is that we have just one test case that fails and when looking at a test trace it isn’t very obvious which validators were used exactly.
Let’s refactor:
Now, when my test pass or fail, it is much more obvious and intuitive as to what exactly was tested, what exactly failed, and why:

Much better! 🌈🦄🎉
If you love Jest as much as I do (😍) you might also be interested in reading some of my other pieces on jest here on dev.to!:
